Begin with the quick checks. Stop if a step requires tools or experience you do not have.
Quick answer: A Dreame L10s Ultra not dispensing water problem is usually caused by an incorrectly seated clean-water tank, the wrong cleaning mode, dry or misaligned mop pads, or interrupted water flow inside the dock. Fill and reseat the tank, select a mopping mode, and start a manual mop-washing cycle.
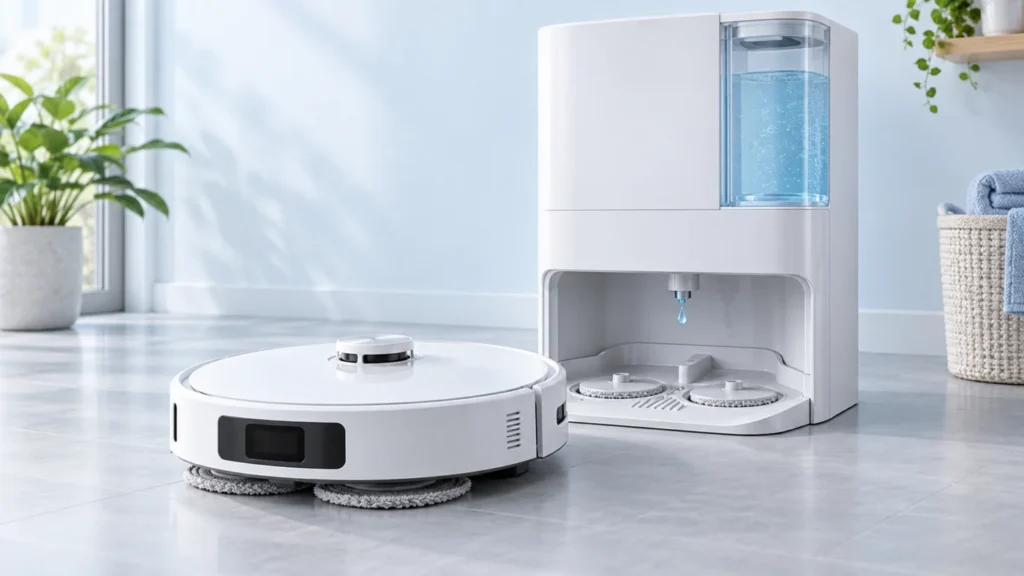
If your Dreame L10s Ultra is not dispensing water, first determine whether water reaches the dock tray. A dry tray points to the clean-water tank or dock supply. If the tray receives water but the mop pads remain dry, check the mop holders, water-level setting, and robot-side water flow.
For more model-specific solutions, browse our Dreame robot vacuum troubleshooting guides or visit the complete robot vacuum repair guide directory.
Before you start
- Pause the current cleaning task.
- Place the robot normally on a level floor.
- Check that the dock is connected to power.
- Use clean, room-temperature water.
- Do not add vinegar, bleach, dish soap, or unapproved detergent.
- Do not open the dock or robot body.
- Do not insert needles or metal tools into water openings.
Begin with the simple checks below. Most water-flow problems can be narrowed down without disassembling the robot or its station.
Dreame L10s Ultra not dispensing water: what to check first
| Symptom | Likely area | First check |
|---|---|---|
| The dock tray remains completely dry | Clean-water tank or dock supply | Reseat the tank and run a manual mop wash |
| The tray gets wet, but the mop pads stay dry | Mop pads, holders, or robot-side water flow | Inspect and reinstall both mop assemblies |
| The pads start wet but dry out quickly | Water-level setting or interrupted flow | Increase the mop wetness setting and retest |
| Only one pad becomes wet | Uneven seating or a restricted outlet | Clean and swap the mop pads for testing |
| The robot vacuums but does not mop | Cleaning mode or mop detection | Select a mopping mode and reinstall the holders |
1. Check the selected cleaning mode
Open the Dreamehome app and inspect the active cleaning settings. The exact menu names may vary slightly depending on the app and firmware version.
Confirm that the robot is using one of the following modes:
- Vacuum and mop;
- Mop after vacuuming;
- Mopping only.
If the robot is set to vacuum only, it may complete the cleaning task without supplying water to the mop pads.
Also check the mop wetness or water-level setting. Select a medium level for the first test. A low setting can make the floor appear almost dry, particularly on warm floors or during a short cleaning cycle.
2. Fill and reseat the clean-water tank
Remove the clean-water tank from the dock and check the water level. Fill it with clean, room-temperature water without exceeding the maximum line.
Before returning the tank to the station, inspect it for:
- a loose or incorrectly fitted cap;
- a folded or displaced rubber seal;
- debris around the tank outlet;
- visible cracks or water leakage;
- an object preventing the tank from sitting flat.
Reinstall the tank firmly in its correct position. It should sit level without rocking or remaining raised on one side.
A tank can look properly installed while its outlet is not fully aligned with the dock connection. Removing and reseating it is therefore worth doing even when no warning appears in the app.
3. Run a manual mop-washing cycle
For a Dreame L10s Ultra not dispensing water problem, this test helps separate a dock-side fault from a robot-side water-flow issue.
Return the robot to the dock and start a mop-washing or mop-cleaning cycle using the app or the available station controls.
Listen for the station pump and inspect the mop-washing tray after the cycle begins.
- If water enters the tray: the clean-water tank and at least part of the dock supply are working.
- If the tray remains dry: the problem is probably associated with the tank connection, dock water path, or dock pump.
- If only a few drops appear: reseat the tank again and inspect the visible tank outlet and tray for residue.
Do not repeatedly run dry washing cycles. Two short tests are enough to determine whether water is moving.
4. Clean the dock tray and visible water areas
Remove the robot from the dock. Switch the station off or disconnect its power before cleaning the tray.
Remove the washable tray components according to the normal maintenance procedure. Clear away hair, dust, detergent residue, and dried dirt with a damp cloth or soft brush.
Pay attention to:
- the mop-washing surface;
- the drain area;
- visible water channels;
- the area where the clean-water tank connects to the dock.
Do not pour water directly into the station and do not push sharp objects into its openings. Internal hoses, seals, pumps, and electrical parts are not intended for user disassembly.
Dry the surrounding surfaces, reinstall the tray, reconnect the dock, and run another short mop-washing test.
5. Inspect the mop pads and holders
Remove both mop-pad assemblies from the robot. Check that each pad is attached evenly to its holder and that neither pad is folded underneath.
Rinse the pads with clean water and gently squeeze out the excess. They should remain evenly damp rather than dripping wet.
Inspect the holders for:
- packed dirt around their attachment points;
- warping or visible damage;
- material blocking the area above the pad;
- pads attached off-center.
Reinstall both holders until they are securely attached. If the app does not recognize the mop assemblies, remove them and install them again.
Starting a test with clean, slightly damp pads also makes it easier to determine whether the system maintains moisture during cleaning.
6. Restart the robot and dock
A temporary control or communication error can interrupt a washing or mopping cycle even when the tanks and pads are installed correctly.
- Stop the current cleaning task.
- Turn the robot off using its normal power control.
- Disconnect the dock from power.
- Wait approximately two minutes.
- Reconnect the dock and turn the robot back on.
- Return the robot to the station.
- Start a new mop-washing cycle.
Open the Dreamehome app and check for an available firmware update. Do not interrupt power while an update is being installed.
7. Perform a controlled mopping test
A controlled test is the fastest way to confirm whether the Dreame L10s Ultra not dispensing water problem has been resolved.
Select a small hard-floor room or a clear test area. Use a mopping mode with the water level set to medium.
Allow the robot to complete its initial mop wash and clean for several minutes. Then pause the task and check the following:
- Are both mop pads evenly damp?
- Is there a light, consistent moisture trail behind the robot?
- Does one side remain noticeably drier than the other?
- Does the app display a water-tank or mop-related warning?
- Does water return to the dock tray during the next washing cycle?
The floor should be lightly damp, not flooded. The L10s Ultra does not need to leave a heavy layer of visible water to mop correctly.
How to identify where the water stops
The Dreame L10s Ultra not dispensing water diagnosis becomes easier when you separate dock water delivery from robot-side flow.
The dock tray stays dry: remove and reseat the clean-water tank, inspect its cap and visible outlet, clean the tray, and restart the station. If water still does not move, stop testing and contact support.
The dock tray gets wet, but the robot cannot keep the pads damp: inspect the pads and holders, confirm the cleaning mode, increase the water level, restart the system, and run a small test area.
One pad remains dry: clean both pads and holders. Swap the left and right pads temporarily. If the dry side follows the pad, replace or deep-clean that pad. If the same side of the robot remains dry, service may be required.
Water flows inconsistently: clean the tank connection and dock tray, use only approved cleaning solution, and retest with clean water.
If the station supplies water but the pads remain dry, compare the symptoms with our guide about robot vacuum mop pads not getting wet. Although the model is different, it can help distinguish a dock-side water problem from a pad or robot-side problem.
When to contact Dreame support
If the Dreame L10s Ultra not dispensing water issue remains after all normal cleaning and reseating checks, stop before opening any sealed pump, hose, or valve assemblies.
Contact support when:
- the dock tray remains dry with a full and correctly seated tank;
- the station pump cannot be heard during a mop-washing cycle;
- the station produces grinding, clicking, or unusual pump noises;
- water leaks from the dock or clean-water tank;
- only one side of the robot repeatedly receives water;
- the app displays a persistent water-system warning;
- the problem returns immediately after restarting the system.
Before contacting support, prepare the robot serial number, purchase receipt, firmware version, app version, and a short video showing the failed mop-washing test. This information can help the service team identify whether the problem is related to the clean-water tank, dock pump, or robot-side water system.
Do not dismantle the dock or force water through its internal lines. Opening sealed assemblies may damage electrical components and can affect warranty coverage.
Dreame L10s Ultra not dispensing water FAQ
Why is the clean-water tank full while the mop pads remain dry?
The tank may not be seated correctly, the robot may be using vacuum-only mode, or the dock may not be moving water. Run a manual mop-washing cycle and check whether water reaches the dock tray.
Can I use vinegar to clean the water system?
No. Vinegar, bleach, dish soap, and other unapproved products may damage seals, create excessive foam, or leave residue inside the water system. Use clean water and only a cleaning solution approved for the machine.
Should the floor be visibly wet after mopping?
The floor should normally be lightly and evenly damp. A heavy layer of water is unnecessary and may indicate that the selected water level is too high.
Can I clear the water outlet with a needle?
No. A needle or metal tool can damage an outlet, seal, or internal hose. Limit user maintenance to accessible surfaces that can be cleaned with a soft brush or damp cloth.
Why does only one mop pad become wet?
One pad may be dirty, incorrectly attached, or worn. Clean both pads and holders, reinstall them, and temporarily swap the pads. If the same side of the robot stays dry, professional service may be required.
What if the pads start wet but become dry during cleaning?
Increase the water-level setting, make sure a mopping mode is selected, and perform a controlled test in a small room. If the robot cannot maintain moisture after a successful dock wash, the robot-side water system may need service.
Official reference: Dreame Support Center.